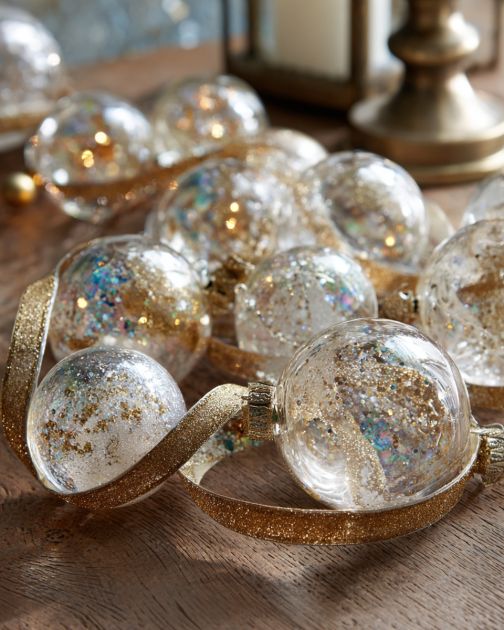
Creating a glitter-dipped ornament garland is a fantastic way to add a personal touch to your holiday decor. This DIY project allows you to transform simple clear ornaments into stunning glittery pieces that catch the light and bring a festive sparkle to your home. It’s a perfect activity for those who enjoy crafting and want to add a handmade element to their holiday decorations. The result is a unique garland that can be draped across mantels, wrapped around Christmas trees, or hung on walls. This project is not only easy and fun but also a great way to get into the holiday spirit.
The glitter-dipped ornament garland fits beautifully in a variety of settings. For a cozy, rustic look, pair it with natural elements like pine cones and evergreen branches. If you prefer a more modern aesthetic, consider using it alongside metallic accents and minimalist decor. The garland can be hung across a fireplace mantel, draped along a staircase railing, or even used as a festive table runner. Its versatility makes it a wonderful addition to any holiday-themed room, instantly adding a touch of glamour and festivity.
Glitter-Dipped Ornament Garland
Materials
Clear plastic or glass ornaments (quantity as desired)
Fine glitter (color of choice)
Mod Podge or clear-drying glue
Foam brush or paintbrush
Holiday ribbon (length depends on garland size)
Scissors
Hot glue gun and glue sticks
Optional: small hooks or ornament caps
Directions
Start by removing the tops of the clear ornaments if they have any.
Using a foam brush, apply a thin layer of Mod Podge or glue to the bottom half of each ornament.
Sprinkle fine glitter over the glued area, ensuring an even coat. Shake off any excess glitter.
Set the ornaments aside to dry completely. This may take a few hours.
Cut the holiday ribbon to your desired garland length, leaving extra for tying or hanging.
Using a hot glue gun, attach each ornament to the ribbon, spacing them evenly apart.
Allow the glue to cool and set before hanging your garland.
If desired, add small hooks or ornament caps to the tops of the ornaments for a finished look.
Variations & Tips
To add a personal touch to your garland, consider using different colored glitters to match your holiday theme or decor. You can also experiment with different widths and styles of ribbon for a varied look. For an even more personalized project, add small embellishments like tiny bells, faux snow, or mini pine branches to the ribbon between the ornaments. If you’re feeling adventurous, try painting designs or patterns on the ornaments before applying the glitter. This DIY project is highly customizable, allowing you to create a garland that perfectly suits your style.