Gardening enthusiasts know that nurturing seedlings indoors is only the beginning of their journey to becoming robust plants. As spring approaches, these tender seedlings must prepare for the transition to the great outdoors, a process known as hardening off. This crucial step helps them acclimate to the harsher conditions they will face outside, such as wind, direct sunlight, and fluctuating temperatures.
Without proper hardening off, seedlings are at risk of transplant shock, a condition that can stunt their growth or even lead to death. By gradually exposing seedlings to the outdoor environment, gardeners can ensure a smoother transition and set their plants up for a successful growing season. This article delves into the details of why hardening off is essential and how to execute it effectively.
1. What Hardening Off Seedlings Actually Means
Hardening off is the process of gradually acclimating indoor-grown seedlings to outdoor conditions. Seedlings that have been grown indoors are accustomed to a controlled environment, with consistent temperatures, humidity, and light levels. By hardening off, gardeners can help seedlings adjust to the variable conditions they will encounter outside.
The process involves exposing seedlings to outdoor conditions in small increments, starting with just a few hours and gradually increasing the time over a period of 7 to 14 days. This gradual exposure allows seedlings to build resilience and adapt without experiencing shock.
2. Why Rushing Seedlings Outside Causes Transplant Shock
Transplant shock occurs when seedlings are moved too quickly from a controlled indoor environment to the unpredictable outdoors. The sudden change in temperature, wind, and sunlight can overwhelm the seedlings’ systems, leading to wilting, yellowing leaves, and stunted growth.
Without the gradual acclimation provided by hardening off, seedlings are unable to regulate their water loss effectively and may suffer from desiccation. Additionally, their roots may not be equipped to absorb nutrients efficiently in the new environment, further compromising their health.
3. When To Start Hardening Off Based On Seedling Age And Weather
Seedlings are typically ready to begin the hardening off process when they are about 4 to 6 weeks old and have at least two sets of true leaves. However, the timing also depends on local weather conditions. Ideally, the process should start when daytime temperatures are consistently above 10°C (50°F) and the risk of frost has passed.
Monitoring the weather forecast is crucial, as sudden cold spells or storms can jeopardize the hardening off process. It’s best to wait for a spell of mild, calm weather to begin.
4. Step-By-Step Schedule For Gradually Increasing Outdoor Time
Begin by placing seedlings in a sheltered, shaded spot outdoors for 1 to 2 hours a day. Over the next week, gradually increase their exposure by 1 to 2 hours each day. By the end of the week, seedlings should be spending around 4 to 5 hours outside.
During the second week, continue to increase outdoor time, aiming for full-day exposure by the end of the week. Be sure to bring seedlings indoors at night, especially if temperatures drop significantly.
5. Managing Sun Exposure: From Shade To Full Sun Safely
Seedlings should initially be placed in a location with indirect sunlight or partial shade. This helps prevent sunburn, which can occur if seedlings are exposed to direct sunlight too quickly.
Gradually increase their exposure to direct sunlight over the course of the hardening off period. By the second week, they should be able to handle a few hours of full sun, eventually working up to full-day sun exposure by the end of the process.
6. Protecting Seedlings From Wind, Temperature Swings, And Rain
Wind can be particularly damaging to delicate seedlings, so it’s important to provide protection, such as placing them near a windbreak or using cloches. Similarly, temperature swings can stress seedlings, so monitor weather forecasts and adjust exposure times accordingly.
Rain can be beneficial or harmful, depending on its intensity. Light rain can help seedlings acclimate, but heavy downpours may damage them. Consider using a cold frame or a temporary cover to shield seedlings from excessive rain.
7. Adjusting Watering And Fertilizing During The Hardening Off Period
As seedlings spend more time outdoors, their watering needs may change. Check the soil moisture regularly, as outdoor conditions can dry out the soil more quickly. Water seedlings in the morning to allow excess moisture to evaporate during the day, reducing the risk of fungal diseases.
Fertilizing should be done with caution during hardening off. A diluted solution of a balanced fertilizer can be applied once or twice during the process to support growth without overwhelming the seedlings.
8. Using Tools Like Cold Frames, Cloches, And Shade Cloth For A Gentler Transition
Cold frames, cloches, and shade cloth are invaluable tools for easing seedlings into outdoor life. Cold frames create a mini-greenhouse effect, providing warmth and protection from wind and pests. Cloches, which are individual covers for seedlings, offer similar benefits on a smaller scale.
Shade cloth can be used to reduce sunlight intensity, preventing sunburn as seedlings adjust to full sun exposure. These tools can be particularly useful during unexpected weather changes, offering a buffer against sudden temperature drops or strong winds.
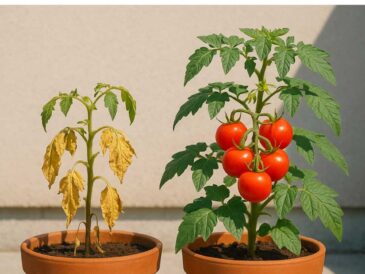
9. Red Flag Signs Of Stress And How To Respond Quickly
During the hardening off process, it’s crucial to watch for signs of stress, such as wilting, discoloration, or leaf drop. Wilting may indicate that seedlings are not getting enough water or are losing moisture too quickly due to wind or sun exposure.
If stress signs appear, temporarily reduce outdoor exposure and ensure that seedlings are adequately watered. Adjust their location to provide more shelter from the elements and consider using tools like shade cloth to mitigate sun stress.
10. The Right Way To Transplant After Hardening Off
Once seedlings have successfully hardened off, it’s time to transplant them into their permanent outdoor location. Choose a cloudy day or late afternoon to minimize transplant shock from direct sunlight
Ensure the planting site is well-prepared, with soil that is loose and rich in organic matter. Dig a hole slightly larger than the seedlings’ root ball, place the seedling gently in the hole, and backfill with soil, pressing lightly to eliminate air pockets. Water thoroughly after planting to settle the soil around the roots.