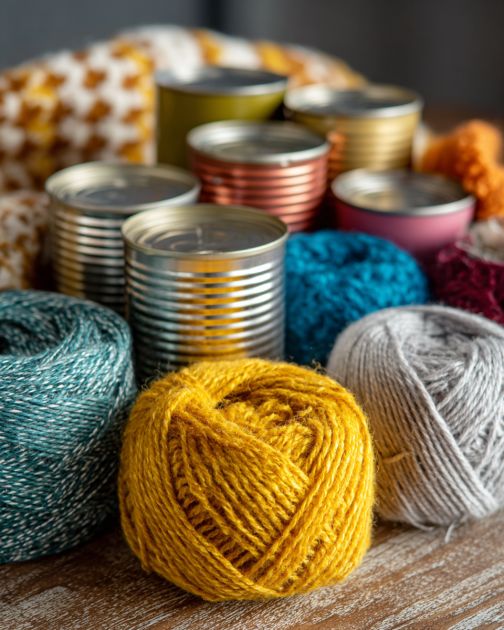
Crafting your own DIY stacked can yarn tree is a delightful and sustainable way to repurpose everyday materials into a stunning piece of home decor. This project not only offers an opportunity to get creative but also provides a unique way to add a personalized touch to your living space. By transforming simple soup cans and yarn into a charming decorative tree, you can enhance your home’s aesthetic while also embracing eco-friendly practices.
The DIY stacked can yarn tree can be styled as a centerpiece on a dining table, an accent on a mantelpiece, or a whimsical addition to a child’s room. Pair it with complementary colors and textures for a cohesive look. Consider using it alongside other natural elements like wooden bowls, plants, or woven textiles to create a cozy and inviting atmosphere. Its versatile design allows it to blend seamlessly with various interior styles, from rustic farmhouse to modern minimalist.
Advertisement
DIY Stacked Can Yarn Tree
Materials
Empty soup cans (3-5, depending on desired height)
Assorted yarn (colors of your choice)
Hot glue gun and glue sticks
Scissors
Cardboard (for the base)
Craft knife
Ruler
Decorative star or topper (optional)
Directions
Clean and dry your empty soup cans thoroughly.
Using a ruler, measure and cut a piece of cardboard to serve as the base of your yarn tree. The base should be slightly larger than the bottom of your largest can.
With a craft knife, carefully cut out the cardboard base.
Stack the soup cans in a pyramid shape, starting with the largest can at the bottom and the smallest can on top. Secure each can to the one below it using hot glue.
Once the glue is dry and the cans are securely stacked, begin wrapping yarn around the entire structure, starting from the bottom. Use hot glue to secure the yarn at the start and at intervals as you wrap.
Continue wrapping the yarn around the cans, alternating colors if desired, until the entire stack is covered.
Secure the end of the yarn with hot glue at the top of the stack.
If desired, attach a decorative star or topper to the top of your yarn tree using hot glue.
Place the finished yarn tree on the cardboard base for added stability.

https://sfglobe.com/xframe.php#acov=%255B%2522sfg%2522%252C%252297214%2522%252C%2522src%253Dfbfan_97214%2522%252C%2522d_abovepromo%2522%252C1764522437%252C%25223%2522%255D&u=https%3A%2F%2Fdiyeverywhere.com%2F2025%2F11%2F17%2Flady-stacks-soup-cans-and-then-glues-on-yarn-try-not-to-be-obsessed%2F%3Fsrc%3Dfbfan_97214%26t%3Dfbsub_diyeverywhereartscrafts&h=https%3A%2F%2Fdiyeverywhere.com
Advertisement
Variations & Tips
To add a personal touch, consider using different types of yarn such as chunky wool, sparkly metallic, or soft cotton for varying textures. You could also paint the cans before wrapping them in yarn for an extra pop of color. For a more natural look, incorporate elements like twine or jute. This project can be adapted seasonally by using colors that correspond to different holidays or themes, such as pastels for spring or earth tones for autumn. Additionally, experimenting with different sizes and shapes of cans can result in a more dynamic and interesting structure.