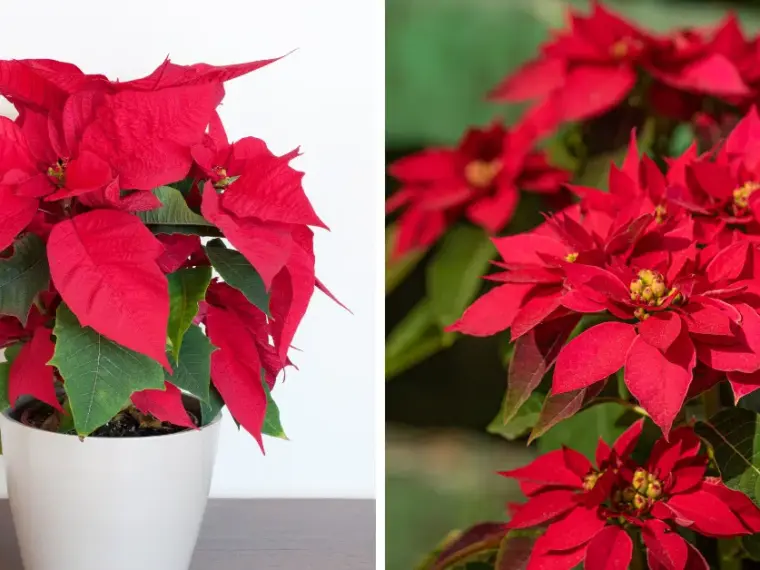
Poinsettias don’t have to be just a holiday treat. When properly propagated, these beautiful plants can flourish year-round, enabling you to enjoy and multiply them well beyond the festive season.
Though often considered tricky, with the right timing, method, and care, propagating poinsettias is achievable for both beginners and seasoned gardeners.
Here’s everything you need to know – from preparing your plant to encouraging blooms in your propagations.
1. The Why and When of Propagation
Starting new poinsettia plants from cuttings offers several rewards. You preserve a favorite holiday variety, expand your collection affordably, and develop a valuable gardening skill.
Propagation also keeps your plant collection out of landfills and instills a profound connection to plant care and growth.
Timing is crucial. Poinsettia stems rooted between late spring and early summer, when the plant is flush with fresh, pliable growth, have the highest success rate.
Avoid cuttings taken near bloom time or in winter dormancy – they’re slower to root and less likely to thrive.
2. Selecting and Preparing the Ideal Cutting
Choose a parent plant that’s vigorous, disease-free, and lush, with fresh green stems—avoid red or woody wood.
Aim for shoots 3 to 5 inches long, each leaving a visible node or two. Using sharp, sterile shears, make your cut just below a leaf node at a 45-degree angle.
Immediately strip away the bottom leaves, retaining just a couple of top leaves to minimize moisture loss while allowing the cutting to nourish itself.
Keep a towel handy to catch any milky latex sap – this sap won’t harm the cutting but can irritate skin, so gloves are smart.
3. Prepping the Cutting and Rooting Medium
While an optional rooting hormone can improve success, poinsettias often root without it. If using one, dip the cut end into a low-concentration powder (about 0.5% IBA) and lightly tap to remove excess.
Use a fresh, well-draining medium such as a 1:1 mix of peat and perlite, sterilized to ward off pathogens.
Fill 2–3 inch pots or germination trays, firming the medium gently before inserting the cutting about one inch deep. Water lightly to settle soil around the stem.
4. Creating the Perfect Rooting Environment
The key to rooting lies in warmth, humidity, and filtered light. Enclose your cuttings under a plastic cloche, dome, or clear bag to maintain very high humidity – ideally around 90%.
Temperature is equally important: maintain the air around 75°F and the soil slightly warmer, around 80–85°F. A heating mat is helpful if room temperatures dip.
Keep the cuttings in bright, indirect light – avoid direct sunlight to prevent burning. This encourages callusing and root formation without causing stress.
Mist the cuttings gently several times a day, balancing hydration with good airflow. After a week, begin cracking the dome open for short periods to acclimate the shoots to normal room humidity.
Continue this process until roots establish, typically within four weeks.
5. How to Tell When Roots Have Formed
Test for roots by lightly tugging on the stem after about 3–4 weeks. If you feel resistance, roots are forming. You’ll also notice fresh leaf growth and the plant looks more upright and refreshed.
Once roots are 1–2 inches long and the plant shows healthy new foliage, prepare to move it out of the high-humidity environment.
6. Transitioning to Potting and Regular Care
Pot the rooted cutting into a 4-inch or larger container filled with a light, porous potting mix that retains some moisture. Water thoroughly to help settle the mix, and place the plant in bright but indirect light.
Over the next month, reduce humidity, gradually open windows or increase airflow, and begin fertilizing every two to three weeks with a balanced houseplant fertilizer.
Once the plant recovers and grows new shoots, pinch back the stem tips periodically to encourage fullness and shape.
7. Tips for Long-Term Growth and Reblooming
To get your propagated poinsettias to bloom again during the holidays, they’ll need a strict light schedule in autumn:
In early fall – around eight to nine weeks before your target bloom time – provide at least 13 hours of uninterrupted darkness each night. Cover your plant with a box or cloth to mimic short winter days.
During the day, give them plenty of bright, indirect light to foster strong bract formation.
Continue watering and fertilizing as usual. Bracts (colored leaves) begin to appear in 8–10 weeks under ideal conditions.
During winter, keep plants in a well-lit area and moderate indoor temperatures, pruning as needed to remove faded or yellowing foliage.
8. Common Challenges and How to Overcome Them
Rotting cuttings: Often caused by wet soil or too little airflow. Let the medium dry slightly and remove the dome sooner.
Cuttings look wilted but don’t develop roots: Raise humidity and temperature slightly; a heating mat can help.
Sparse foliage after potting: Feed regularly, provide adequate light, and pinch back when new branches appear.
Failure to bloom: Check your light-blocking schedule – plants must have 13 hours of darkness each day for several weeks.
9. Expert-Level Propagation Tips
- Automated misting systems can maintain humidity more consistently.
- LED grow lights placed close to cuttings speed up rooting and support nighttime callusing.
- A thin dab of honey on exposed cuts can inhibit microbes, offering a natural defense during rooting.
- You can reuse well-sterilized old potting trays or pots; clean them with dilute bleach, rinse fully, and dry before use.
- Keep a propagation journal: note dates, environmental conditions, and results to improve your technique year after year.
10. Propagation Timeline Snapshot
- Spring (Late May–June): Select parent plant and take cuttings.
- Week 1: Place under dome or cloche, mist regularly, maintain warm conditions.
- Week 2–3: Begin ventilating the dome, maintain warmth, continue humidity cycles.
- Week 4–5: Gradually reduce humidity, ease into normal light and watering schedule.
- Week 6: Transplant rooted cuttings into 4″ pots with regular potting mix.
- Weeks 8–12: Fertilize every 2–3 weeks and pinch to build structure.
- Late Summer/Early Fall: Initiate short-day regiment (13 hours darkness per day).
- October–December: Watch colorful bracts emerge; continue care through winter season.
Propagating poinsettias is a satisfying, eco-friendly way to extend their seasonal beauty and deepen your gardening expertise.
With perfect timing, careful handling, and a controlled environment, you can multiply a single plant into several vibrant specimens that bloom annually.