Bees need more than flowers. While nectar and pollen get most of the attention, clean, shallow water is just as important for bee health and hive survival.
Bees use water to cool their hives, dilute stored honey, feed larvae, and regulate internal temperature during hot weather.
The problem is that most garden water sources – buckets, birdbaths, puddles – are too deep or too smooth-sided, which puts bees at risk of drowning.
The good news is that you can build a safe, effective bee waterer in minutes using simple household items – often for free, and almost always for under $5.
A proper bee water station gives pollinators a safe landing surface, shallow access, and stable moisture. Once discovered, bees will return to it daily.
Why Bees Need a Dedicated Water Source
Most gardeners assume bees drink from flowers – but nectar is not enough. Bees actively collect water and bring it back to the hive.
Worker bees distribute droplets inside the colony and fan their wings to create evaporative cooling – essentially natural air conditioning.
Bees especially need water for:
- Cooling the hive in hot weather
- Feeding developing larvae
- Diluting crystallized honey stores
- Supporting digestion
- Maintaining hive humidity balance
Without safe shallow water, bees are forced to use risky sources like muddy puddles, pool edges, pet bowls, or dripping tap – where drowning risk is high.
Providing a bee waterer reduces those risks and supports local pollinator populations.
What Makes a Good Bee Waterer (Design Rules)
A proper bee waterer is not just a bowl of water. It must follow a few simple design principles to be safe and attractive to pollinators.
A good bee waterer should have:
- Very shallow water access
- Safe landing surfaces
- Textured or absorbent materials
- Stable footing
- Gradual moisture exposure
- Partial sun placement
- Consistent refill level
Bees cannot land safely on smooth water surfaces – they need stones, wood, cork, or texture to stand on while drinking.
The $5 Bee Waterer – Basic Method (Most Reliable Design)
This is the simplest, most reliable low-cost bee waterer design.
Materials (budget version)
- Shallow dish, tray, or plant saucer
- Small rocks, pebbles, or gravel
- Water
Estimated cost: $0–$5 depending on what you already own.
Step-by-Step Instructions
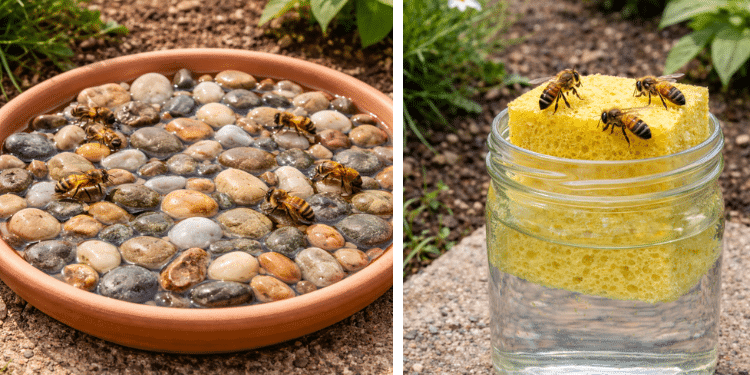
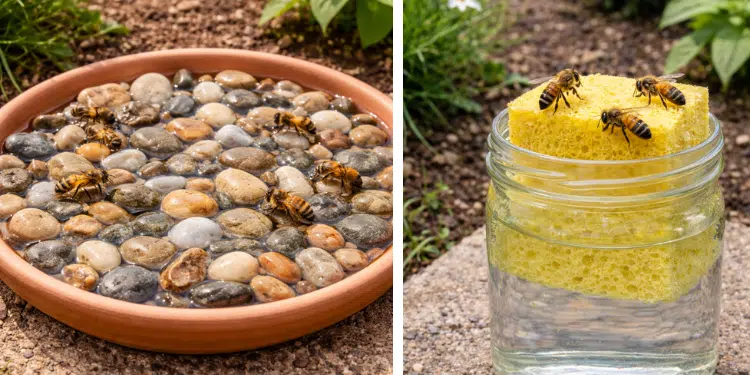
Start with a shallow container — a plant saucer or old plate works perfectly. Fill the container with small stones or gravel so that the tops of the stones sit above the water line. Then add water slowly until it reaches just below or level with the stone tops.
The goal is to create many tiny safe landing spots where bees can stand without slipping into deep water.
Place the dish on stable ground or a flat surface in your garden.
That’s it — your bee waterer is ready.
Alternative $5 Designs Using Common Items
You can build equally effective bee waterers using other low-cost materials.
Jar + Sponge Bee Waterer
This design works well where evaporation is high.
Materials
- Glass jar or plastic container
- Natural sponge or cotton cloth
- Water
Method
Fill the jar with water and place a sponge inside so it sticks partly above the water surface. The sponge absorbs water and provides a textured drinking surface.
Bees land on the sponge instead of open water – much safer.
Replace or rinse the sponge weekly to prevent algae buildup.
Flower Pot Saucer + Marbles Method
Marbles create stable drinking platforms and look decorative.
Materials
- Plant saucer
- Glass marbles or aquarium stones
- Water
Fill saucer with marbles, then add water just below marble tops. Bees land on the marbles and sip safely.
Cork Float Waterer
Wine corks are excellent bee floats because they never sink.
Add several corks to a shallow bowl of water. They naturally float and provide safe landing pads.
This is one of the best zero-cost methods.
Why Stones and Texture Matter for Bees
Bees cannot tread water. Their wings become waterlogged quickly, and smooth surfaces offer no grip.
Textured surfaces – stone, cork, rough wood, sponge – allow bees to stand securely while extending their proboscis to drink.
The safest bee waterers always provide multiple textured contact points.
Where to Place Your Bee Waterer (Critical for Success)
Placement determines whether bees will actually use your waterer.
Best placement:
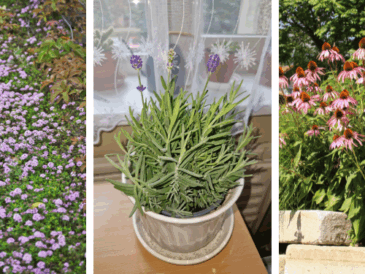
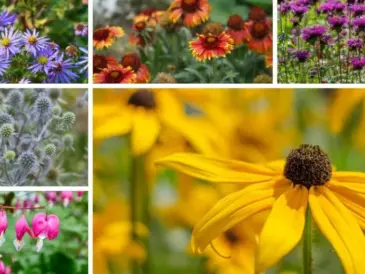
- Near flowering plants
- Within 10–30 feet of pollinator areas
- In morning sun, afternoon shade
- Sheltered from strong wind
- Away from heavy foot traffic
- Not directly under dripping irrigation
Avoid deep shade – bees prefer warm water sources.
Avoid placing right beside birdbaths – birds may disturb bee access.
How Bees Discover New Water Sources
Bees find water through scout behavior. A few bees explore randomly and mark safe water sources using scent cues. Once a safe source is found, more bees follow.
This means:
- First few days may show little activity
- After discovery, usage increases
- Consistency matters – keep it filled
Adding a small pinch of mineral salt or a drop of sugar initially can help attract first visitors – but do not overdo it.
Should You Add Sugar to Bee Water?
Plain water is best for long-term use. Bees already gather nectar – they come to water for hydration and mineral content, not sugar feeding.
If you use sugar water to attract first visitors, use it only once, very diluted, then switch to plain water.
Why Slightly “Dirty” Water Attracts More Bees
Interestingly, bees often prefer slightly mineralized water – not ultra-pure distilled water. Natural puddles contain trace minerals and organic matter.
You can safely add:
- A pinch of sea salt
- A tiny bit of soil
- A small stone with mineral deposits
Do not add chemicals or fertilizers.
Maintenance – Keeping Your Bee Waterer Safe
A neglected waterer becomes unsafe. Maintenance is simple but important.
Refresh water every 2–3 days in hot weather. Rinse stones weekly to prevent algae and mosquito larvae. Scrub container lightly when slime appears.
Moving water slightly during refill discourages mosquitoes.
If mosquitoes are common in your area, use very shallow designs that dry partially between refills.
Bee Waterer vs Birdbath – Key Difference
Birdbaths are usually too deep and slippery for bees. Even shallow birdbaths need added stones or floating corks to become bee-safe.
Never assume a birdbath alone protects pollinators.
Seasonal Use – When Bee Waterers Matter Most
Bee water stations are most important:
- Early spring (few natural sources)
- Summer heat waves
- Drought periods
- Urban gardens
- Balcony gardens
In very cold seasons, bees are less active and waterers are less necessary.
How Many Bee Waterers Should You Have?
For small gardens – one is enough.
For larger gardens – one per major flower zone.
Spacing multiple small waterers works better than one large one.
Common Mistakes to Avoid
Most failed bee waterers share the same problems:
- Water too deep
- No landing texture
- Smooth container surface
- Fully shaded placement
- Inconsistent refill
- Slippery glass only design
Always prioritize shallow + textured + stable.
Kid-Friendly Garden Project
Bee waterers are excellent children’s garden projects. Kids can:
- Place stones
- Arrange corks
- Decorate saucers
- Monitor bee visits
It teaches pollinator awareness and responsibility.
Ecological Impact – Small Action, Real Benefit
A single bee waterer will not “save the bees,” but it does provide localized survival support, especially in dry urban areas.
Combined with pollinator plants and reduced pesticide use, it becomes part of a meaningful pollinator support system.
Small habitat supports add up across neighborhoods.
Building a bee waterer is one of the easiest, cheapest, and most impactful things a gardener can do for pollinators.
With a shallow container, a handful of stones, and a few minutes of setup, you can create a safe hydration station bees will use all season.