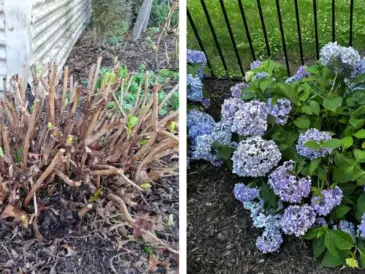
Hydrangeas are beloved flowering shrubs, turning gardens into a sea of color with their iconic globe-shaped or lacecap blooms.
While they’re available in nurseries each spring, there’s a rewarding and cost-saving alternative: propagating your own hydrangeas from cuttings.
Surprisingly, the best time isn’t spring or summer – it’s fall. Taking cuttings in autumn gives you stronger plants, higher success rates, and vigorous shrubs ready to flourish by the following growing season.
Why Fall Beats Spring or Summer for Hydrangea Cuttings
Most gardeners reach for the pruning shears in late spring or midsummer, when shrubs look lush. Counterintuitively, autumn delivers better rooting and stronger young plants.
Here’s what shifts in fall – and why it matters:
Semi-hardwood stage (the “Goldilocks” wood): By early–mid fall, the current season’s stems are firm but not fully woody. In propagation terms, that’s “semi-hardwood.”
Soft green shoots from early summer desiccate and collapse; fully lignified winter wood resists root initiation. Semi-hardwood balances water retention with cambial activity, rooting faster and with fewer losses.
Carbohydrate reserves move to the base: As days shorten, hydrangeas reallocate sugars and hormones downward, priming basal nodes for rooting. You’re working with the plant’s physiology, not against it.
Cooler air, gentler light: Cuttings fail primarily from water stress. Fall’s cooler temperatures reduce transpiration, so cuttings lose water more slowly, while soil is still warm enough (ideally 65–75°F / 18–24°C) to push root initials.
Dormancy = root focus: Above-ground growth slows as winter approaches. That gives your cuttings an undisturbed period to quietly build robust root systems before leafing out in spring.
Lower pest pressure: Heat-loving pests (aphids, mites, thrips) abate, and fungal pressure is easier to control with good airflow and sanitation.
Know Your Hydrangea: Which Types Root Most Readily?
Hydrangeas aren’t all the same. Rooting ease and aftercare vary by species and bloom wood (old vs. new).
Hydrangea arborescens (smooth hydrangea, e.g., ‘Annabelle’)
Roots: Very easy.
Blooms: On new wood – forgiving if you prune later.
Best for beginners.
Hydrangea paniculata (panicle types, e.g., ‘Limelight’, ‘Bobo’)
Roots: Easy to moderate, slightly slower than arborescens.
Blooms: On new wood – pruning flexible.
Hydrangea macrophylla (bigleaf, mophead/lacecap) & H. serrata (mountain)
Roots: Easy in fall with semi-hardwood.
Blooms: On old wood (except rebloomers), so be careful with late pruning the next year.
Hydrangea quercifolia (oakleaf)
Roots: Moderate; prefers warm rooting media and higher humidity; slower to establish.
Blooms: Mostly on old wood.
Tip: If you’re new to propagation, start with arborescens or paniculata, then add macrophylla and serrata. Attempt oakleaf once your setup is dialed in.
Tools & Materials You’ll Need
Successful propagation starts with preparation. Gather:
- Sharp pruning shears (sterilized to avoid disease transfer)
- Healthy mother hydrangea (avoid pest/disease damage)
- Rooting hormone (gel or powder, optional but boosts success)
- Containers (small pots, seed trays, or cell packs)
- Potting mix (equal parts perlite & peat/coco coir for drainage)
- Humidity dome (plastic bag, cloche, or propagator lid)
- Misting spray bottle
- Plant labels (important if you’re propagating multiple varieties)
Step-by-Step Guide: Taking Hydrangea Cuttings in Fall
Step 1. Select the Right Stem
- Choose stems that are 6–8 inches long, from this year’s growth.
- Ensure they are non-flowering – flower stems rarely root.
- Look for firm, semi-hardwood sections with 3–4 leaf nodes.
Step 2. Make the Cut
Snip just below a leaf node, as this is where rooting hormones are most concentrated.
Step 3. Prepare the Cutting
- Remove the lowest set of leaves.
- Cut the top leaves in half (reduces transpiration).
- Strip off any buds or flowers.
Step 4. Apply Rooting Hormone
- Dip the cut end in water, then into rooting hormone.
- Tap off excess to prevent clumping.
Step 5. Plant in Potting Mix
- Insert the cutting about 2 inches deep in moistened soil.
- Firm the mix around the base to hold it upright.
Step 6. Create a Humidity Tent
- Cover the pot with a clear plastic bag or propagator lid.
- Use sticks to prevent plastic from touching leaves.
Step 7. Place in Proper Light
- Keep in bright, indirect light (avoid direct sun).
- Maintain temps between 65–75°F (18–24°C).
Rooting Methods: Which Works Best?
Hydrangea cuttings can root in different mediums. Each has pros and cons:
Soil Method (most reliable)
- Classic mix of perlite & peat.
- Balanced moisture & aeration.
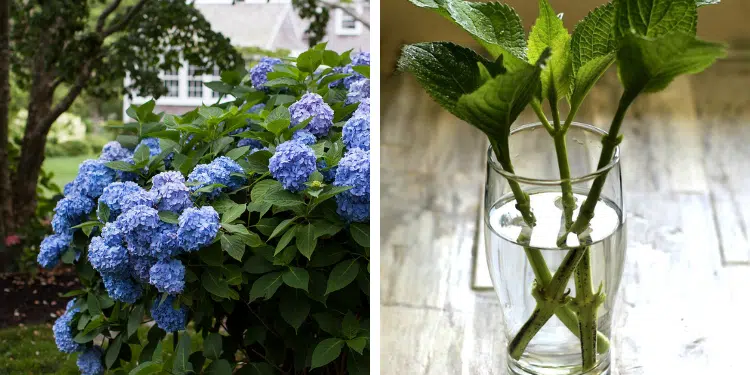
Water Propagation
- Simple: place cuttings in water until roots appear.
- Fun to watch, but roots can be weaker when transplanted.
Sphagnum Moss Method
- Wrap cuttings in damp moss & seal in a plastic bag.
- High humidity, good for difficult cuttings.
Direct Ground Method
- Stick cuttings straight in a shaded garden bed.
- Riskier, but if successful, produces hardy plants.
For beginners, the soil method gives the highest success rate.
Month-by-Month Guide: Hydrangea Cuttings from Fall to Spring
September
- Begin propagation while stems are semi-hardwood.
- Take 6–8 inch cuttings, prep them, and pot into containers.
October
- Keep cuttings indoors or in a cold frame.
- Mist lightly every few days to maintain humidity.
November–December
- Growth slows. Don’t overwater.
- Roots are forming quietly.
January–February
- Continue monitoring. Cuttings may begin to show resistance when tugged.
- Remove any dead or rotting stems to protect healthy ones.
March–April
- Once roots are 2–3 inches long, repot into larger containers.
- Begin hardening off outdoors (gradual sun exposure).
May–June
- Plant rooted cuttings in the garden after the last frost.
- Feed with balanced fertilizer to encourage growth.
Troubleshooting: Why Cuttings Fail (and How to Fix It)
Symptom: leaves collapse within 24–48 hours
- Cause: Excessive transpiration; humidity too low or heat too high.
- Fix: Increase humidity (dome), move to indirect light, lower temps to 65–70°F.
Symptom: stem base turns black/mushy
- Cause: Waterlogged media, poor sanitation, fungal infection.
- Fix: Discard infected cuttings; sterilize tools; use sharper drainage; water less frequently.
Symptom: powdery white film, grey fuzz on leaves or media
- Cause: Powdery mildew or Botrytis in stagnant air.
- Fix: Improve airflow, vent domes more often, remove affected material; avoid overhead wetting.
Symptom: roots form in water but die after potting
- Cause: Water-formed roots lack lignification for soil.
- Fix: Pot into a very airy mix; keep humidity high; transition slowly (partial dome) for 1–2 weeks.
Symptom: no roots after 8–10 weeks
- Cause: Wood too soft/hard, cool root zone, no hormone, low carb reserves.
- Fix: Re-cut from firmer semi-hardwood; warm the root zone; use IBA; choose non-flowering stems.
Hydrangea Varieties & Propagation Success
Different hydrangea types propagate with varying ease:
- Hydrangea macrophylla (Bigleaf/Mophead) – Easy, roots well in fall.
- Hydrangea paniculata (PeeGee, Limelight) – Also roots well, slightly slower.
- Hydrangea quercifolia (Oakleaf) – More challenging, prefers warmer temps.
- Hydrangea arborescens (Annabelle) – Very easy; fall cuttings root readily.
Long-Term Care: From Cutting to Bloom
- Year 1 – Focus is on root growth. Don’t expect flowers.
- Year 2 – Stronger plant, may produce light blooms.
- Year 3+ – Full flowering potential, especially if cared for properly.
Tip: Hydrangeas prefer morning sun, afternoon shade, and evenly moist soil.
The Benefits of Growing Hydrangeas from Fall Cuttings
- Save money – One plant can give you dozens.
- Share with friends – Pass along rooted cuttings.
- Preserve heirlooms – Keep grandma’s hydrangea alive in new generations.
- Eco-friendly – Reduce plastic nursery pot purchases.
- Faster establishment – Fall cuttings root during dormancy for a strong spring start.
Hydrangeas symbolize abundance, gratitude, and beauty – and there’s no better way to multiply their charm than by propagating your own.
Fall cuttings are nature’s gift: the stems are at the ideal maturity, the weather favors rooting, and winter offers the perfect resting period for underground growth