In the quest for flawless skin, many of us face common challenges such as milia, clogged pores, and rough skin texture. These issues can be frustrating, as they detract from the smooth, glowing complexion we all desire. While there are countless products on the market promising to address these concerns, they can often be expensive and filled with harsh chemicals that irritate sensitive skin.
Fortunately, there are simple, natural solutions that you can create at home. With just a few readily available ingredients, you can concoct an effective exfoliating mixture that can help tackle these skin issues. By understanding what causes milia, clogged pores, and rough texture, you can take a proactive approach to improving your skin’s health and appearance.
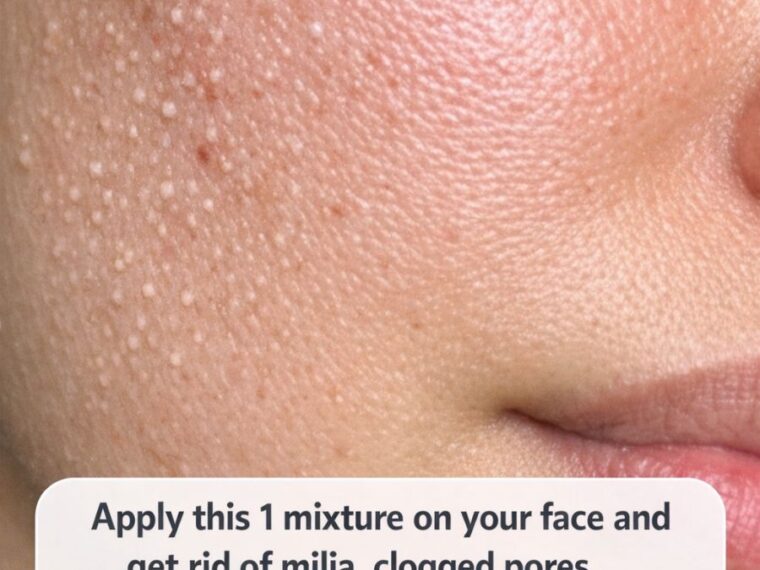
1. What Milia, Clogged Pores, And Rough Texture Really Are
Milia are small, white, keratin-filled cysts that form just under the skin, often around the eyes and cheeks. They are not acne and are more common in newborns but can affect people of all ages. Clogged pores, on the other hand, occur when excess oil, dirt, and dead skin cells accumulate in the skin, leading to blackheads and whiteheads. Rough skin texture is usually a result of a buildup of dead skin cells on the surface, which can make the skin appear dull and feel uneven.
Understanding these conditions is the first step in treating them effectively. Milia are caused by trapped dead skin cells, while clogged pores result from excessive oil and debris. Rough skin texture is often due to a lack of exfoliation, which prevents new, healthy skin cells from surfacing. Addressing these root causes can help improve your skin’s overall appearance and health.
2. Why One Simple Exfoliating Mixture Can Tackle All Three
An exfoliating mixture works by gently removing the outer layer of dead skin cells, which can help prevent milia and clear clogged pores. This process also smooths out the skin’s texture, revealing a more radiant complexion underneath. Exfoliation is a key step in any skincare routine because it encourages cell turnover and unclogs pores, reducing the likelihood of breakouts and improving skin texture.
By combining ingredients that have both physical and chemical exfoliating properties, you can create a powerful treatment that addresses multiple skin concerns simultaneously. This dual-action approach not only helps clear existing skin issues but also prevents them from recurring by keeping the skin clear and smooth.
3. The Exact Ingredients You Need For The Glow-Boosting Mixture
To create this effective exfoliating mixture, you will need one tablespoon of finely ground oatmeal, one tablespoon of honey, and one tablespoon of plain yogurt. Oatmeal is a gentle physical exfoliant that helps remove dead skin cells without irritating the skin. Honey is a natural humectant and antibacterial agent, which helps to hydrate the skin and reduce the risk of infection. Yogurt contains lactic acid, a natural alpha hydroxy acid (AHA) that provides chemical exfoliation by dissolving dead skin cells.
These ingredients work synergistically to exfoliate, hydrate, and soothe the skin, making this mixture suitable for most skin types. The natural properties of each component help to enhance your skin’s natural glow and improve its overall texture.
4. Step-By-Step: How To Mix It For Maximum Effectiveness
To prepare the mixture, start by grinding the oatmeal into a fine powder using a coffee grinder or food processor. This ensures the oatmeal is gentle enough for the skin. In a small bowl, combine the ground oatmeal, honey, and yogurt. Mix well until the ingredients are thoroughly blended into a smooth paste.
Make sure all ingredients are at room temperature, as this allows for better mixing and application. Once the mixture is ready, it can be stored in the refrigerator for up to one week, allowing for multiple applications.
5. How To Apply The Mixture Safely On Your Face
Before applying the mixture, cleanse your face with a gentle cleanser to remove any makeup, oil, or dirt. Pat your face dry with a clean towel. Using clean fingers, apply the mixture evenly over your face, avoiding the eye area. Massage the mixture gently into the skin using circular motions for about two minutes to enhance exfoliation.
Leave the mixture on your face for 10-15 minutes to allow the ingredients to penetrate the skin. Rinse off with lukewarm water and pat dry. Follow up with a moisturizer to lock in hydration.
6. How Often To Use It For Visible Results
For optimal results, use this exfoliating mixture 2-3 times a week, depending on your skin’s tolerance. Over-exfoliating can lead to irritation, so it’s important to monitor how your skin responds and adjust the frequency accordingly. Consistent use over several weeks will yield the best results, improving skin texture and clarity.
7. What To Expect: Timeline For Smoother, Clearer Skin
After the first few applications, you may notice your skin feeling softer and looking more radiant. Within two to four weeks of regular use, you should see a reduction in milia and clogged pores, as well as an improvement in overall skin texture. Achieving smoother, clearer skin takes time, so patience and consistency are key.
Results can vary depending on individual skin types and conditions, but with continued use, most people will experience noticeable improvements in their skin’s appearance and feel.
8. Mistakes To Avoid So You Don’t Irritate Or Damage Your Skin
One common mistake is applying too much pressure while exfoliating, which can damage the skin’s barrier. Always use gentle circular motions and avoid scrubbing harshly. Another mistake is using the mixture too frequently, which can lead to over-exfoliation and irritation. Stick to the recommended usage frequency and adjust if your skin becomes sensitive.
Avoid using other exfoliating products or treatments on the same day to prevent skin irritation. Always patch test a small amount of the mixture on your wrist or behind your ear to ensure you don’t have an adverse reaction.
9. How To Customize The Mixture For Sensitive, Oily, Or Dry Skin
For sensitive skin, reduce the amount of oatmeal and increase the honey content to add more soothing properties. You can also add a teaspoon of aloe vera gel for extra calming effects. For oily skin, consider adding a few drops of tea tree oil, which has antibacterial properties that can help control acne. For dry skin, increase the amount of yogurt to enhance hydration, and add a few drops of jojoba oil or argan oil to boost moisture.
Customization allows you to tailor the mixture to meet your specific skin needs, ensuring you get the most out of your DIY treatment.
10. Expert-Backed Tips To Keep Milia And Clogged Pores From Coming Back
Maintaining a consistent skincare routine is crucial. Cleansing your face twice daily with a gentle cleanser helps keep pores clear of debris and oil. Regular exfoliation, as described in this article, prevents the buildup of dead skin cells. Hydration is also key—keeping your skin moisturized ensures a healthy skin barrier and reduces the likelihood of pore blockages.
Additionally, avoid heavy makeup and skincare products that can clog pores. Look for non-comedogenic options and always remove makeup before bed. A balanced diet and adequate water intake also contribute to overall skin health.
11. When To Skip DIY And See A Dermatologist Instead
If you have persistent skin issues that do not improve with home treatments, it may be time to consult a dermatologist. Conditions like severe acne, cystic acne, or skin infections require professional evaluation and may need prescription treatments. Additionally, if you experience any adverse reactions such as redness, swelling, or itching from the DIY mixture, discontinue use immediately and seek medical advice.
Dermatologists can provide personalized skincare recommendations and treatments that address your specific concerns more effectively than DIY methods alone. It’s always best to err on the side of caution when dealing with persistent or severe skin issues.