Transforming ordinary plant wire baskets into stunning light fixtures is an innovative and cost-effective way to enhance your home decor. This DIY project is perfect for those looking to add a touch of elegance and warmth to their living space without breaking the bank. By combining simple materials with a bit of creativity, you can create a unique lighting solution that adds character and charm to any room.
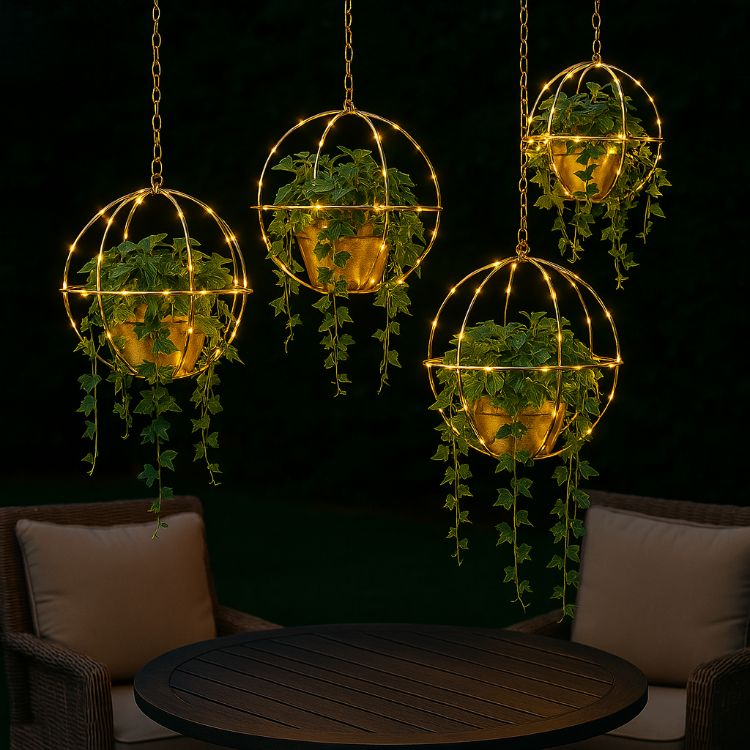
These DIY light fixtures can be styled in various ways to complement your interior design. Hang them in the living room for a cozy ambiance, or use them as bedside lamps for a soft, romantic glow. The industrial look of the wire baskets pairs beautifully with modern, minimalist, or rustic decor. Consider using Edison bulbs for a vintage touch or colored LED lights for a more contemporary feel.
Wire Basket Hanging Light Fixtures
Like DIY Everywhere – Arts & Crafts for more
Materials
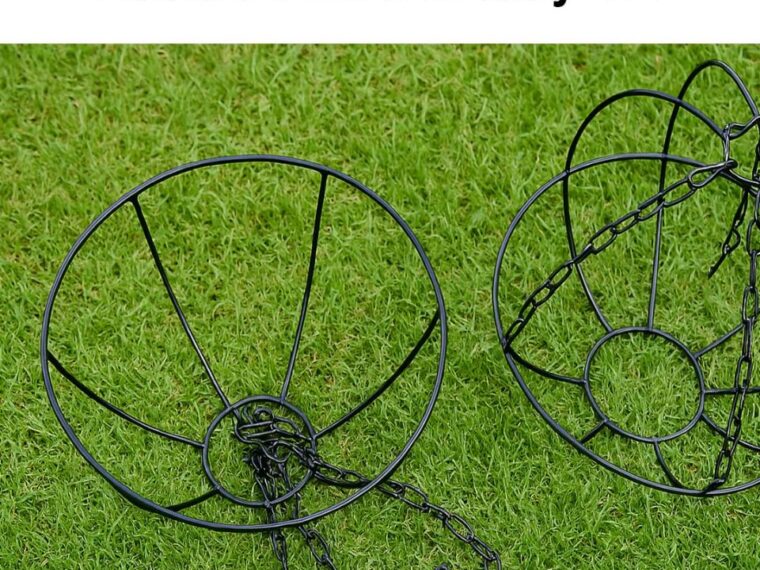
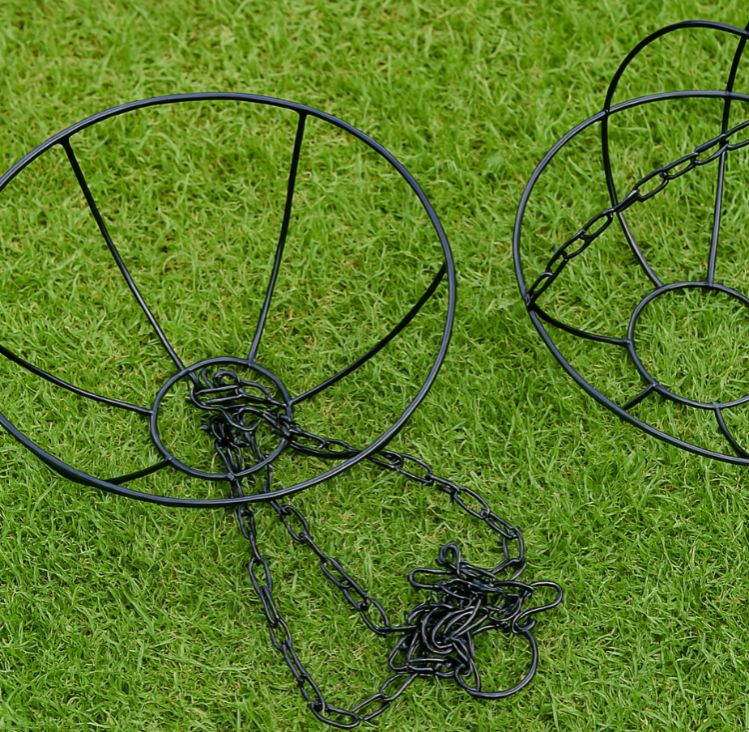
2 wire plant hanging baskets (metal frame only; remove coco liners if any)
Small terracotta or plastic plant pot (should fit inside the basket snugly)
Plant of your choice (succulents, herbs, trailing ivy, or flowers)
Soil (suited to your plant type)
Battery-operated or solar-powered fairy lights (warm white for a cozy look)
Zip ties or floral wire (to secure the baskets and lights)
Chain or sturdy rope (for hanging)
Spray paint (optional) – black, gold, copper, or white for color customization
Drill (optional) – for drainage holes or mounting help
Directions
1. Assemble the Basket Frame
Place one wire basket upright (open side up) and the other upside down on top to form a globe/cage shape.
Use zip ties or floral wire to secure the edges where the two baskets meet. Tighten evenly around the rim to make it stable.
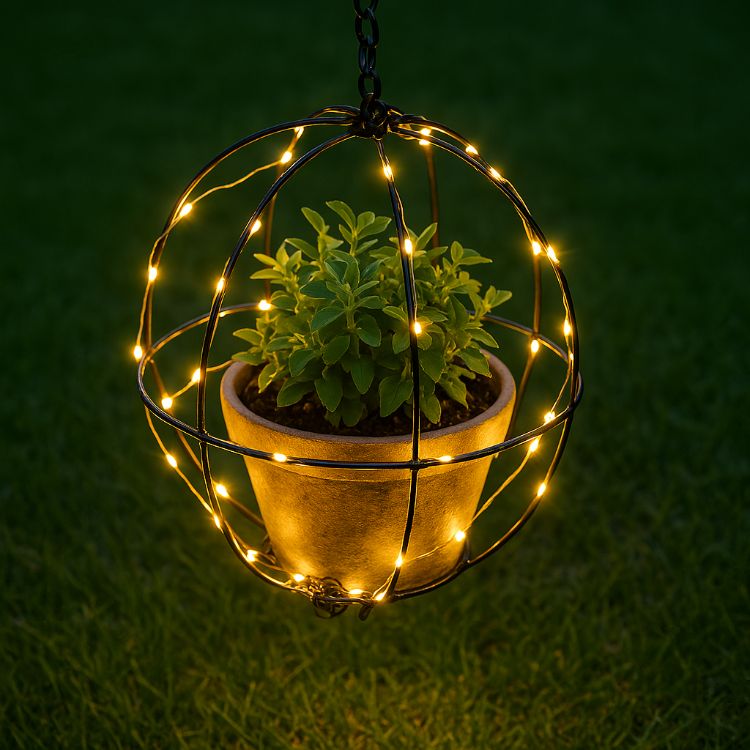
2. Fit in the Planter
Insert your potted plant through the opening at the bottom. The pot should sit comfortably inside the wire “cage.”
If needed, secure the pot to the frame with wire loops or use a smaller pot to leave more visual space inside the globe.
3. Wrap with Fairy Lights
Starting from the top hanging point, gently wrap fairy lights around the wire frame in a spiral or crisscross pattern.
Make sure the battery pack is easily accessible (usually near the top, secured inside the frame or hidden under foliage).
If you’re using solar lights, attach the panel to the top chain, so it gets light during the day.
4. Add the Chain and Hang It Up
Attach the chain (from one of the original baskets) back to the top of the globe structure.
Make sure it’s balanced and hangs evenly. Hook it onto a sturdy branch, ceiling hook, or wall bracket.
Final Look
Simple Version
More Elevated Version

Even More Elevated Version
Like DIY Everywhere – Arts & Crafts for more
Variations
🔹 Paint It Your Style
Spray the metal frame with a color that matches your vibe—try metallic gold for glam, matte black for modern, or pastel tones for a cottage feel.
🔹 Switch Up the Plants
Use:
Trailing plants (like string of pearls or ivy) for drama.
Herbs (like basil or mint) for a functional kitchen garden.
Seasonal flowers for a rotating color palette.
🔹 Add Crystal or Bead Drops
Hang a few beads or crystals from the bottom to catch the light and add sparkle during the day.
🔹 Create a Cluster
Make several of these in varying sizes and hang them at different heights for a magical, layered garden look.
🔹 Use for Events
Perfect for garden parties or weddings. You can swap the plant for a floral foam ball and tuck in fresh or faux flowers for centerpieces or aisle decor.
Pro Tips
If you’re using a solar fairy light, make sure the panel faces up and gets direct sunlight.
Battery fairy lights work best under a covered patio where solar charging might not be reliable.
Want it to look even cozier? Add moss or coco liner pieces around the base of the plant to hide the pot and add texture.